Luxcrete

Follow us:

Call Us:

01582 488 767 | 0208 9657292

Author name: psgsol.official

Blog

Are Your Pavement Lights Designed for Modern Day Loads

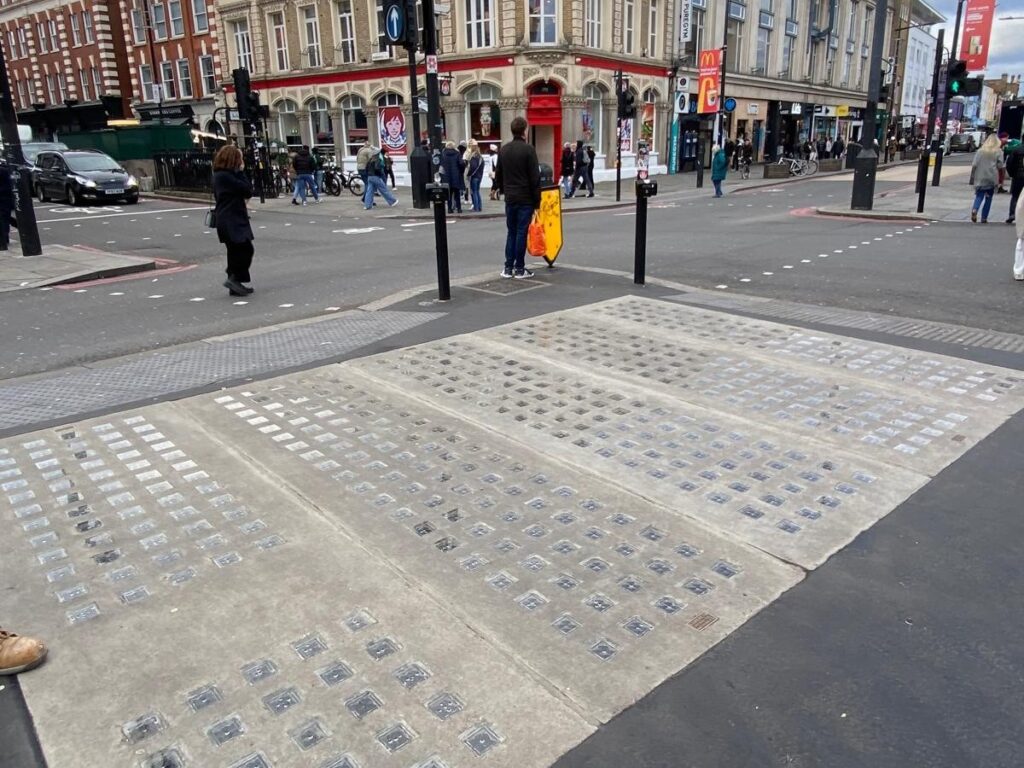
Are Your Pavement Lights Designed for Modern Day Loads? July 2, 2026 psgsol.official 12:29 pm Are Your Pavement Lights Designed for Modern Day Loads Victorian cast-iron pavement lights are a familiar feature across historic streets in the UK, particularly in cities like London. Originally designed to bring natural light into underground spaces such as basements and cellars, they played a vital role in how buildings functioned during the Victorian era. However, while many of these installations remain in place today, the environments around them have changed dramatically. Increased traffic, modern safety expectations, and decades of wear mean that many original systems are no longer fit for purpose. For architects, contractors, and building owners, the key question is no longer just how to preserve these features, but how to ensure they perform safely in modern conditions. What Are Victorian Cast Iron Pavement Lights? Often referred to as vault lights, Victorian pavement lights were introduced in the early 19th century as a practical solution for illuminating underground spaces. They typically consist of cast-iron frames set into pavements, fitted with small glass lenses designed to channel light below ground. Inspired by prism lighting used in maritime settings, they provided a safe alternative to open flame lighting in enclosed areas. These systems quickly became a standard feature in urban design, particularly in dense cities where maximising usable space was essential. Today, they remain a distinctive architectural feature, often found in historic streets and around listed buildings. A Legacy of Craftsmanship and Innovation The widespread use of cast-iron pavement lights reflects the ingenuity of the Victorian era. Cast iron offered both strength and versatility, allowing manufacturers to create durable panels with intricate details and patterns. These panels were designed to withstand pedestrian use and the general wear associated with busy streets. In many cases, they have lasted well over a century, a testament to their original quality and manufacture. However, age inevitably takes its toll. Over time, exposure to the elements leads to corrosion, cracks in the glass, and issues such as water ingress. While these features were built to last, they were not designed with modern load requirements or long-term environmental exposure in mind. Why Many Historic Pavement Lights Fall Short Today Although Victorian pavement lights were highly effective in their time, they were never engineered for the conditions they face today. Modern challenges include: Increased pedestrian traffic in urban environments Occasional or sustained vehicle loading Long-term structural wear and material fatigue Water ingress affecting both the panels and surrounding structure These factors can significantly reduce the safety and durability of original installations. In some cases, panels may appear intact but no longer meet required load-bearing standards. For this reason, simply preserving existing pavement lights without proper assessment can present a risk, particularly in high-traffic areas or public spaces. Key Components and Common Failure Points Traditional iron pavement lights are made up of three main elements: Cast iron frames Glass lenses or blocks Bedding and sealing materials Each of these components can degrade over time. Cast iron frames may corrode, weakening the structure. Glass panels can develop cracks or become loose, reducing both safety and light transmission. Meanwhile, failed seals allow water ingress, which can damage both the panel and the surrounding building fabric. Understanding these failure points is essential when planning any restoration or replacement project. Restoration vs Replacement: Making the Right Decision One of the most important decisions in any project involving pavement lights is whether to restore existing panels or replace them entirely. Restoration may be appropriate where: Original designs are of significant heritage value Damage is limited and can be repaired The structure can still meet the required performance standards However, in many cases, replacement offers a more practical and long-term solution, particularly where safety, durability, and compliance are priorities. A detailed site survey is essential to determine the most appropriate approach. Modern Pavement Light Systems: Built for Today Rather than simply replicating historic designs, modern pavement light systems are engineered to meet the demands of contemporary environments. At Luxcrete, we have developed advanced glass and concrete panels that deliver significantly improved performance while maintaining the visual appeal of traditional pavement lights. These modern systems are: Designed to support both pedestrian and vehicle traffic Tested to high load standards Engineered to prevent water ingress Built for long-term durability with minimal maintenance Unlike traditional cast-iron pavement lights, these solutions are specifically developed to meet current building regulations and performance expectations. Improved Light, Strength and Durability Modern pavement light panels also offer enhanced performance in terms of light transmission and structural integrity. Glass components are typically toughened or laminated, improving resistance to impact and reducing the risk of failure. Panel construction methods are designed to distribute loads more effectively, reducing stress on individual components. In addition, improved sealing systems help prevent water ingress – one of the most common causes of long-term damage in older installations. The result is a system that not only enhances natural light in underground spaces but also provides a safer and more reliable surface at ground level. The Importance of a Professional Survey Before making any decisions about restoration or replacement, a professional assessment of the existing pavement lights is essential. A detailed survey will: Record dimensions and layout Identify damage such as cracks, corrosion, and wear Assess load-bearing capability Provide clear recommendations for next steps Luxcrete offers a dedicated survey service to help building owners and project teams understand the condition of their pavement lights and determine the most appropriate solution. Starting with a survey ensures that decisions are based on accurate information – reducing risk and helping to avoid unnecessary costs later in the project. Working Within Listed Buildings and Conservation Areas Many pavement lights are located within listed buildings or conservation areas, where preserving original features is a key consideration. In these cases, projects must balance: Retention of historic character Compliance with conservation requirements Modern safety and performance standards This often involves a combination of restoration and sensitive replacement, ensuring that the final

Projects

Richmond Train Station

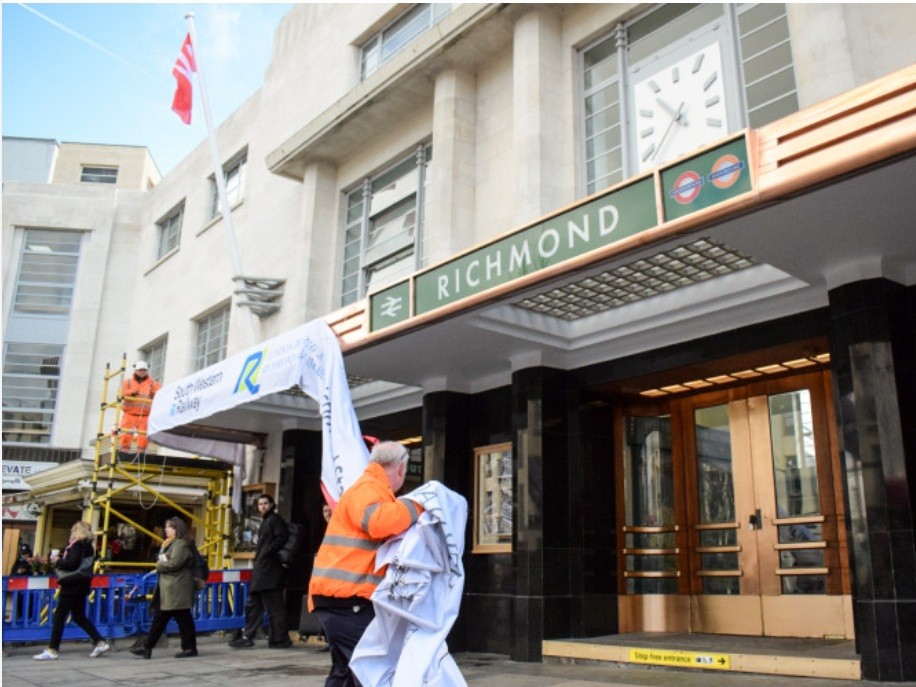
Richmond Train Station Home June 18, 2026 psgsol.official 6:29 pm Richmond Train Station Richmond Train Station Canopy Roof Lights Luxcrete was instructed to replace the original rooflights within the canopy which had been covered up for many years and they were discovered to be in poor structural condition.  The roof lights would be recreating the 1930’s Glasscrete effect.  https://www.southwesternrailway.com/richmond-station-restoration ROOF LIGHTS Type R.200/75 glazed with 165mm x 165mm pressed and annealed glass prism pattern lenses set in nominal 75mm deep adequately reinforced concrete ribs at 200mm cross centres. Previous Post

Projects

Truefitt & Hill

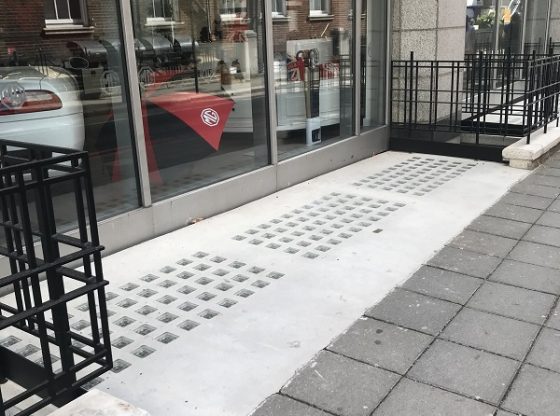
Truefitt & Hill Home June 18, 2026 psgsol.official 6:20 pm Truefitt & Hill Truefitt & Hill Mens grooming store. Luxcrete Limited were instructed to replace the old original cast iron Pavement Lights. These cast iron Pavement Lights were in a poor condition with numerous broken/damaged glass lenses and the frames worn smooth, they had become unsightly as well as losing their structural integrity. Luxcrete removed the existing cast iron Pavement Lights and cut back the bearings before setting up the formwork within the structural opening and then casting in situ our Pavement Lights construction type P.150/100. This construction contains 100 x 100mm glass lenses set into reinforced concrete ribs which are spaced at 150mm centers with an overall panel thickness of 100mm. Previous PostNext Post

Projects

Camden High Steet WC

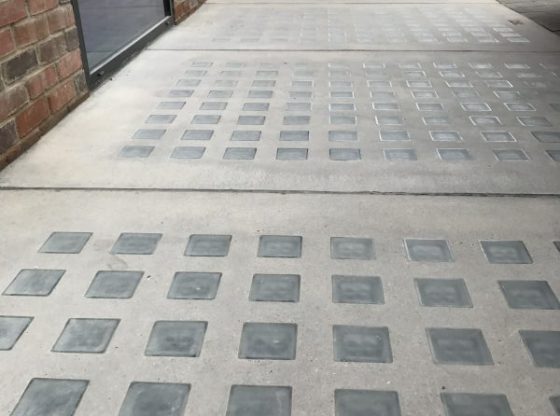
Camden High Steet WC Home June 18, 2026 psgsol.official 6:09 pm Camden High Steet WC Camden High Street basement public toilets Luxcrete Pavement Lights construction type P.150/100 were installed due to the currenct pavement lights in a poor condition with numerous broker/damaged glass lens. Luxcrete removed the existing reinforced concrete Pavement Lights and cut back the bearings before setting up the formwork within the structural opening and then casting in situ our Pavement Lights construction type P.150/100. This construction contains 100 x 100mm glass lenses set into reinforced concrete ribs which are spaced at 150mm centres with an overall panel thickness of 100mm. Previous PostNext Post

Projects

MG Showroom

MG Showroom Home June 1, 2026 psgsol.official 8:35 am MG Showroom MG Showroom Marylebone Road. Luxcrete Pavement Lights construction type P.150/100 were installed to form bridge panels over the open lightwell. Large panels were formed to allow potential customers to view the vehicles and smaller panels were formed to allow access to the showroom Previous PostNext Post

Projects

Tokenhouse Yard

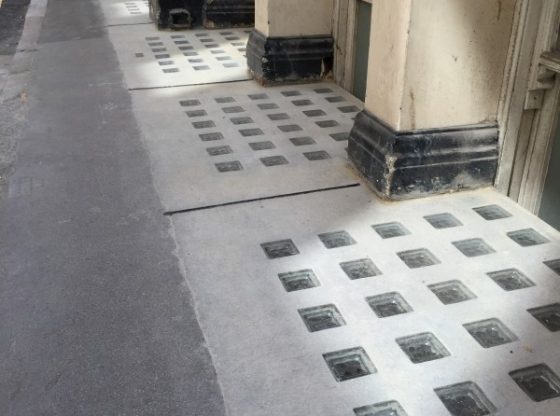
Tokenhouse Yard Home June 1, 2026 psgsol.official 8:35 am Tokenhouse Yard Luxcrete Limited were instructed to replace the old original cast iron Pavement Lights. These cast iron Pavement Lights were in a poor condition with numerous broken/damaged glass lenses and the frames worn smooth, they had become unsightly as well as losing their structural integrity. Luxcrete removed the existing cast iron Pavement Lights and cut back the bearings before setting up the formwork within the structural opening and then casting in situ our Pavement Lights construction type P.150/100. This construction contains 100 x 100mm glass lenses set into reinforced concrete ribs which are spaced at 150mm centres with an overall panel thickness of 100mm. Previous PostNext Post

Projects

Dalston Lane

Dalston Lane Home June 1, 2026 psgsol.official 8:35 am Dalston Lane Dalston Lane is a mixed use development located in the London Borough of Hackney. Luxcrete Limited were chosen to install a combination of our glazed and non glazed smoke outlet panels. Here we cast in situ our P.150/100 construction using 100mm x 100mm glass lenses set at 150mm centres and our S.150/100 non glazed panels with brass demarcation set into the top face to denote the structural opening. Previous PostNext Post

Projects

50 Sloane Street

50 Sloane Street Home June 1, 2026 psgsol.official 8:35 am 50 Sloane Street 50 Sloane street project comprised basement lowering of an existing flat and covering the open light well to create a new retail unit. Luxcrete Pavement Lights construction type P.165/110 was specified to allow natural daylight to the basement area. This construction type uses our 100mm x 100mm pressed and annealed prismatic glass lenses set at 165mm centers with an overall construction depth of 110mm. Previous PostNext Post

Blog

Cast In Situ Explained: What to Expect on Site

Cast In Situ Explained: What to Expect on Site June 1, 2026 psgsol.official 7:51 am Cast In Situ Explained: What to Expect on Site When you hear the term “cast in situ,” it simply means concrete that is poured, compacted and cured directly at its final position on the construction site. Unlike precast concrete manufactured elsewhere, this method transforms raw building materials into permanent structures right where they’ll stand for decades. Understanding what happens on site during casting concrete operations helps project managers, architects and contractors make informed decisions about their construction process. This guide walks through the meaning, workflow, advantages and practical considerations you’ll encounter when choosing this traditional yet versatile method. Introduction to Cast In Situ Concrete The cast in situ meaning is straightforward: fresh concrete is placed into temporary formwork at its intended location, where it hardens to form the finished structure. This approach has been standard practice across UK and EU construction projects since the mid-20th century, particularly for slabs, foundations, retaining walls and structural frames. Terminology can cause confusion, but the following all describe the same on-site pouring process: Cast in situ concrete In-situ concrete Cast in place concrete Each refers to concrete placed into formwork around steel reinforcement bars, where cement hydration – influenced by water content, temperature and curing conditions – develops properties like compressive strength and durability. While precast suits standardised, repetitive elements, cast in situ offers the site-specific adaptability many projects requiring unique shapes demand.   Cast In Situ Meaning & Basic Concept Cast in situ concrete describes the process of placing fresh concrete mix into temporary formwork erected on site around fixed reinforcement, where it hardens into its permanent structural shape. Key characteristics of this method include: The mould is a temporary formwork rather than permanent factory moulds, allowing direct adaptation to site geometry and subsoil conditions Monolithic structure creation with minimal joints across slabs, beams and walls, enhancing load distribution and structural continuity Hydration-based curing, where cement reacts with water to develop strength, modulus of elasticity and durability based on mix composition and placement execution Joint-minimised load-bearing elements including foundations, walls, columns, slabs and tunnel linings This method is widely used on construction projects from small house extensions to multi-storey office buildings, basements and car parks. Cast In Situ vs Precast Concrete Both methods use concrete as their primary material, but the difference lies in where casting and curing occur. Precast concrete: Elements such as beams, columns, stairs and façade panels are cast in factories under controlled conditions, cured to high standards, and delivered ready for installation. Factory production enables accelerated curing, weather independence and no on-site strength testing requirements. Main distinctions: Casting location: Factory for precast; construction site for cast in situ Curing environment: Precise quality control over mix, placement and curing in factories; variable outdoor conditions on site Transport requirements: Precast elements need transport logistics for potentially oversized loads; cast in situ eliminates this concern Shape possibilities: Precast uses reusable moulds; cast in situ offers unlimited geometry. However, careful consideration must be given to the size and shape of all panels to minimise the possibility of shrinkage. Certain site conditions and locations may dictate in situ casting. Our technical department can provide expert advice. Typical precast applications: Repetitive units requiring consistency Long spans such as walkways, car park roof lights, stairways and bridges Industrial buildings and warehouses Retaining wall units and drainage components Typical cast in situ applications: Complex geometry and bespoke features Basements and lift cores Shear walls and heavily loaded foundations Post-tensioned slabs Projects requiring unique shapes where factory retooling isn’t economical Many modern projects from the 2010s onwards use a hybrid approach, combining precast speed with cast in situ flexibility. Precast saves time with no curing wait on-site, while cast in situ provides design freedom and seamless integration with existing structures. Cast In Situ Concrete Construction Process The construction process for situ concrete follows a logical sequence, with each stage building upon the previous. Here’s what to expect during concrete pouring operations. Site preparation: Setting out dimensions and levels Excavation to formation level Placing blinding concrete for a clean, stable base Installing services and any embedded items prior to pouring Reinforcement fixing: Placing and tying steel bars, chairs, links and mesh per structural drawings Following requirements such as BS EN 1992 (Eurocode 2) for bar spacing and cover Ensuring proper cover for reinforcement for long-term durability Formwork erection: Using systems such as traditional timber or steel panels Creating shape-giving, sealed support for the wet concrete Checking alignment and stability before the pour Concrete delivery and placement: Ready-mix trucks arriving on scheduled pour dates Concrete is pumped or discharged directly into formwork Managing placement rates and concrete temperatures Compaction: Using internal vibrators to eliminate air pockets Achieving full contact with reinforcement and form faces Preventing defects like honeycombing that compromise structural integrity Curing process: Maintaining moisture and temperature using compounds, wet coverings or insulated formwork Continuing for at least 7 days in typical UK conditions Controlling shrinkage cracking and ensuring uniform strength gain Striking formwork: Removing after concrete reaches 50–70% of design strength Verifying strength through cube tests Prioritising safety and avoiding damage to edges Advantages of Cast In Situ Concrete In the 2020s, designers and contractors continue choosing cast in situ for compelling practical reasons. The method offers distinct advantages over precast elements in the right circumstances. Design flexibility: Create curved walls, transfer beams, cantilevers and bespoke staircases Form helical shapes, sloping soffits and irregular grids No factory retooling required for unique geometries Architects can realise creative visions within engineering limits Structural continuity: Monolithic slabs, beams and cores improve robustness Enhanced progressive collapse resistance Superior watertightness across large structures Better load distribution throughout the frame On-site adaptability: Accommodate late design changes without major programme impact Easier service penetrations and coordination with mechanical and electrical trades Adjust openings, recesses and built-in features during construction Transport benefits: No oversized loads on public roads Reduced road disruptions, especially in urban or remote sites Lower transport costs

Blog

A Practical Maintenance Checklist for Pavement Lights and Rooflights

A Practical Maintenance Checklist for Pavement Lights and Rooflights June 1, 2026 psgsol.official 7:34 am A Practical Maintenance Checklist for Pavement Lights and Rooflights Pavement lights are glazed panels set flush with the surface of a footway, designed to transmit natural light into underground spaces such as basements and cellar areas. These installations typically consist of cast iron, steel, or concrete frames infilled with glass lenses or glass blocks that withstand heavy foot traffic while allowing daylight to penetrate below ground level. You will find pavement lights in a range of locations across UK cities: Public footways outside commercial buildings Building entrances and lobby areas above basements Loading bays where delivery vehicles require access Courtyard areas positioned over storage rooms and offices The loading demands on these systems are considerable. They must cope with constant exposure to pedestrian traffic, occasional vehicle loading from delivery vans, freeze–thaw cycles during winter months, and urban pollution that accumulates on the surface. These factors combine to cause gradual deterioration of seals, joints, and the glass or lens units themselves. Key reasons for regular maintenance: preventing water ingress into basements maintaining structural integrity avoiding slips and trips Damaged pavement lights not only compromise the safety of pedestrians above but can also lead to significant moisture problems in the underground spaces they serve. Older Victorian lights often have original cast-iron frames and prism lenses, which require more careful, conservation-led maintenance. These heritage installations demand specialist knowledge to balance restoration with modern safety expectations. Key Takeaways Regular pavement light maintenance keeps basements and lower-ground floors dry, bright, and compliant with safety standards in busy UK city centres. Neglecting seals, frames, and glass lenses typically leads to water ingress, corrosion, and costly structural repairs within 3–5 years. A planned inspection and maintenance schedule (at least annually and after severe weather) can extend pavement light lifespan beyond 40–50 years. Modern systems combine glass, cast iron or steel frames, mastic asphalt, liquid-applied waterproofing, and slip-resistant pavement light finishes to meet current loading and safety requirements. Specialist contractors should handle major maintenance, particularly on heritage cast-iron pavement lights and heavily trafficked London pavements. Common Pavement Light Defects to Look For Most serious failures are visible from the pavement surface if you know what to look for. A systematic approach to identifying defects helps you prioritise pavement light repairs before they escalate into structural problems requiring full replacements. Glass and Lens Problems Defect Type Visual Signs Risk Level Cracked units Visible fracture lines, chips at edges High – trip hazard and water entry Crazed glass Fine network of surface cracks Medium – reduced strength Missing lenses Empty frame openings Critical – immediate hazard Surface spalling Flaking or pitting on the glass surface Low – monitor closely Opaque or stained glass Yellowed, cloudy, or stained appearance Low – reduced light transmission When pavement glass no longer transmits light effectively, its purpose is undermined. Lens repairs or full replacement may be necessary to restore natural light to the spaces below.       Frame Issues Cover frame issues carefully: rusting or section loss on cast iron or steel, movement of frames relative to surrounding paving, and loose or rocking frames underfoot. Steel and cast iron frames suffer from corrosion over time, particularly where waterproof coatings have failed or where joints allow moisture to penetrate. Frame movement is a serious concern. If you notice the frame shifting when walked upon, this indicates that the bedding or fixings have deteriorated. Left unaddressed, this movement accelerates wear on surrounding joints and creates trip hazards. Seal and Joint Failures The perimeter seal is your first line of defence against leaks. Common failures include: Perished mastic that has shrunk away from the frame edges Open gaps between the frame and surrounding asphalt or paving slabs Failed liquid-applied membranes that have cracked or debonded Missing or degraded bitumen flashings Internal Warning Signs From the basement or cellar, look for these clues that water is finding its way through: Staining on soffits directly beneath pavement lights Rust streaks on supporting steelwork Blistering paint or surface coatings Damp patches appearing during or after rain Mould growth in previously dry areas We would recommend recording defects with dated photographs and notes to compare from one maintenance visit to the next. This documentation proves invaluable when planning remedial work or discussing issues with specialist contractors. Inspection and Maintenance Schedule Establishing a consistent inspection cycle is essential to catching problems before they require major intervention. Annual Inspection Routine It is advisable to schedule routine visual inspections at least once a year, ideally in late autumn before heavy winter rain and freezing conditions, and after any major storm event. This timing allows you to address any emerging issues before the harshest weather arrives. Step 1: Surface Inspection from Above Walk the entire area methodically, examining each panel in turn. Gently rock each glass unit with your foot (without using tools) and check for: Movement or wobbling under pressure Visible cracks on the surface Rattling noises indicating loose components Unevenness relative to the surrounding pavement Step 2: Internal Inspection from Below From the basement or cellar, check for signs of moisture, rust staining, and active drips during heavy rain. Bring a torch and moisture meter, where available, to assess dampness in supporting structures. Pay particular attention to the point where the frame meets the ceiling structure. Step 3: Documentation Keep a simple maintenance log recording: Inspection date and weather conditions Observed defects with location notes Photographs showing problem areas Temporary measures taken (if any) Recommendations for specialist repair Frequency Adjustments High-traffic commercial pavements require more attention than quiet residential courtyards. Consider these guidelines: Location Type Recommended Frequency Retail frontages Every 6 months Standard commercial premises Annually Residential buildings with low traffic Every 18-24 months Properties with known water ingress history Every 6-12 months Councils and highway authorities in the London area often have specific requirements for pavement lights on public footways, so check local guidance for your site.     Routine Cleaning and Daylight Restoration Dirt,